
|
|
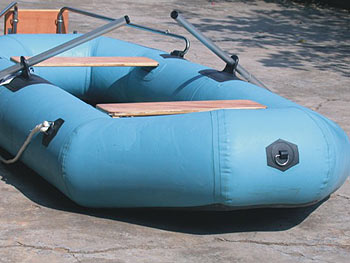
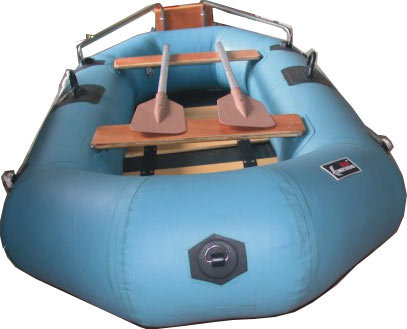
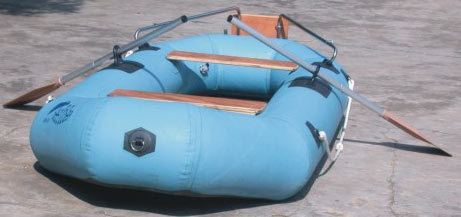
| MB-03 Inflatable-boat |
| Click go to larger picture |
|
|
|
|
|
|
|
|
| |

Manual
Inflation
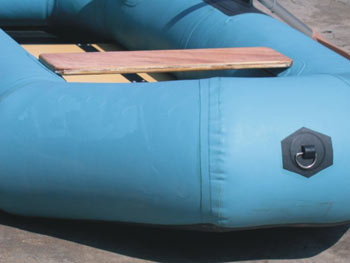
Before starting, locate a relatively flat, clean space to unpack your boat. Unroll the boat so it is laid out flat, and locate your pump. First, you are installing floorboards on your boat. Next, screw the plastic seal in the boat.After inflate chamber 1 using the nozzle with either pump,and then chamber 2, but do not exceed over pressure.
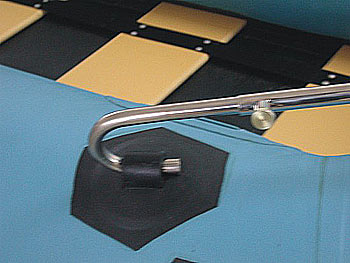
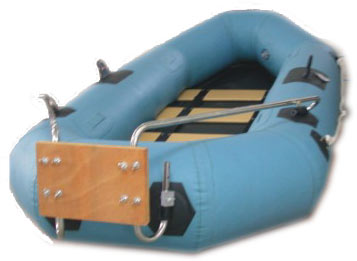
Motormount Assembly
Your boat should be 100% inflated to install the motor-mount correctly, has motormount rods which are shaped like a letter "J ". First insert the shaped like a letter "J "of rod as a hook mount and through into one side of the retainer rings.And then, repeat it another side. And adjust the longer of rod to fit the stern of boat and screwed it. Holding the wood motormount block to the back of the rods, place the U shaped clamps on the inside of the tubes. Insert a bolt through the clamp on each side and fasten with a knurled nut & washer behind the board. Make sure the motormount block is mounted at the highest position.
Motoring
See To Sea fishing boats are very light compared to similar sized hardhull boats, so they perform well with small outboard motors. As with any boat, you need to be keenly aware of the wind and water conditions around you. Since these boats take small engines, you won't always be able to motor past every current. You don't want to be caught with a 4 knot boat trying to fight a 5 knot tidal current. As with all boating, a little planning goes a long way.
Safety
In addition to properly registering your See To Sea, it is your responsibility to be aware of and to comply with all relevant safety regulations. In all water sports you should have reasonable swimming ability. Just as swimmers have a cardinal rule about not swimming alone, you should never go boating alone.
The next point to consider is having a personal floatation device (PFD). Not only is it the law, but from our point of view, it is just plain foolish not to have PFD's for everyone aboard. You can use U.S. Coast Guard approved flotation cushions or Coast Guard approved life jackets. The type of water conditions you are going in should determine which is safer for you. Depending on the circumstance and the type of boating you enjoy, you should consider other safety measures (i.e. if you're white water rafting, it might be wise to wear a wet suit, gloves, and even some sort of protective helmet).
White Water River Running
You should read some books on the basics of white water rafting. In particular, you must become aware of the danger posed by up and downstream eddies, drops, falls, rocks, trees, branches, shredded aluminum canoes, broken glass and other obstacles that you may come across. It is also important to read up and know the danger posed by any river you choose to run. With a basic understanding of white water rafting and the river you are going on.
One last note of caution, please remember to wear life jackets!
Disassembly and deflation
If you are planning on storing your boat for a long period, you should wipe it down with a towel to remove any moisture to prevent any mildew forming on your boat. First remove the knurled nuts and the curved brackets from your motormount and store the motormount block and all hardware.
Unscrew the deluxe one way valves on chambers 1 & 2 and then remove the motormount by depressing the push buttons at the bot-tom of the tube. Pull the motormount tubes out of the lower grommet, and then the top two grommets. Rotating the tube from left to right helps with removing the motormount from the top tubes. Remove the side struts from the floorboards, and then lift the boards out of the hull. After all the valves are opened, allow the boat to deflate for a minute or two. Flip the boat over. Fold the left side of the boat over. Fold the right side over the left. Starting from the bow, roll toward the stern of the boat tightly to force out any remaining air. When you are done your boat will be compact and ready into storage bag.
Care and Maintenance
There is very little that you have to do to keep your boat in almost new condition for many years. You may store it inflated or deflated. If you leave it outside, you should raise it up off the ground and cover it with a tarp if it is going to be in direct sunlight or exposed to leaves, berries or rain. If you leave it in the water, you will probably have to empty out the water every time it rains (this will also harm the wooden floorboards over time). If you store it in a closet, basement or garage, we recommend picking a cool, dry spot, making sure the boat is clean and dry before you pack it up - otherwise mold can accumulate while it is stored.
We reccommend the use of talcum powder on the surface of the boat and Restorer.
Troubleshooting
Leakage of air: If your boat appears a bit soft, it might not be because of a leak. If the boat was inflated late in the day with 90 degree air, that air might cool 20 degrees overnight. The cooler air exerts less pressure on the hull, so it could appear soft the next morning.
If there has been no temperature variation, you need to start looking for a leak. Below are the three best methods
1) Visual inspection. Get a good look at your boat from just a few feet away. Flip it over and closely check over the outside. Any large leaks should be clearly visible.
2) Listening. If you have a rough idea where your leak is, you can sometimes hear it in a quiet room.
3) Soapy water. Use a mix of dishwashing liquid and water in a spray bottle, and spray over suspicious areas. Any leak will produce bubbles that will pinpoint the location of the leak.
Check your valves: Look, listen, and if necessary, spray soapy water around your valve and the valve base. Leaky valves have several causes:
1) Crossed threads. Make sure that both the inner valve and the outer cap are firmly screwed together. If threads are crossed on either item a slow leak could result. A good way to avoid this is to first turn the outer cap back 1/4 turn.
2) Sand in Diaphragm, Check the black diaphragm at the bottom of the inner valve for sand between the diaphragm and the inner valve. Also check the threads on the inner valve, boat hull, and outer cap for any dirt or sand which might break the seal.
Repairs
Through use you may occasionally puncture your boat.Most leaks only take a few minutes to repair. Your boat comes with a repair kit, and additional repair supplies can be ordered from our dealer.
Rips or Tears: Cut a piece of repair material large enough to over-lap the damaged area by approximately 1/2". Round off the edges.
Apply adhesive to the underneath side of patch and around the area to be repaired.
Too much glue will interfere with a proper repair. Allow adhesive to become tacky
(2 - 4 minutes). Place the patch on the damaged area and press down firmly. You may
want to use a weight on top to keep it in place. Allow 12 hours for repair to dry.
After patch has dried, apply glue around the edges for a complete seal (dry 4 hours).
Email:sales@fish-finder.org